I am often asked for a pattern to make twiddle blankets. This is a challenging task for me as my twiddle blankets evolve as I crochet or knit. I really enjoy the freedom of creating each blanket as a unique piece. Gauge and finished size are not important. The only important fact I keep in mind is to make sure the twiddle blanket (or mat) can sit comfortably on a patient’s lap or on the hospital tray that goes across the bed.
Top Tip: Because these blankets are smaller than the traditional blankets, I prefer to call these creations twiddle mats.
So here goes! I am sharing with you my steps in making a twiddle mat. Remember the finished size is not important.
Step 1
- I am using double knit yarn (dk) in the example below and size 4 mm hook. You can use aran (10 ply) yarn and a size 5 mm hook, too and follow the pattern. If you are using bulky/ chunky yarn and a size 6 to 7 mm hook (or holding 2 double knit strands together), you could reduce the chain numbers. But remember size doesn’t matter, so you could use the same chain numbers. Confusing? Well remember size is not important
- So I will add the finished size of my mat when I have completed the whole blanket.
- I am using the half double crochet (HDC) stitch, my favourite crochet stitch.
You could use any stitch. I like to practise new stitches on these pieces, and sometimes I add in different colours and yarn textures.
- I chained 60. (You can chain any number you like if you want to make a different size. Remember there are no rules!)
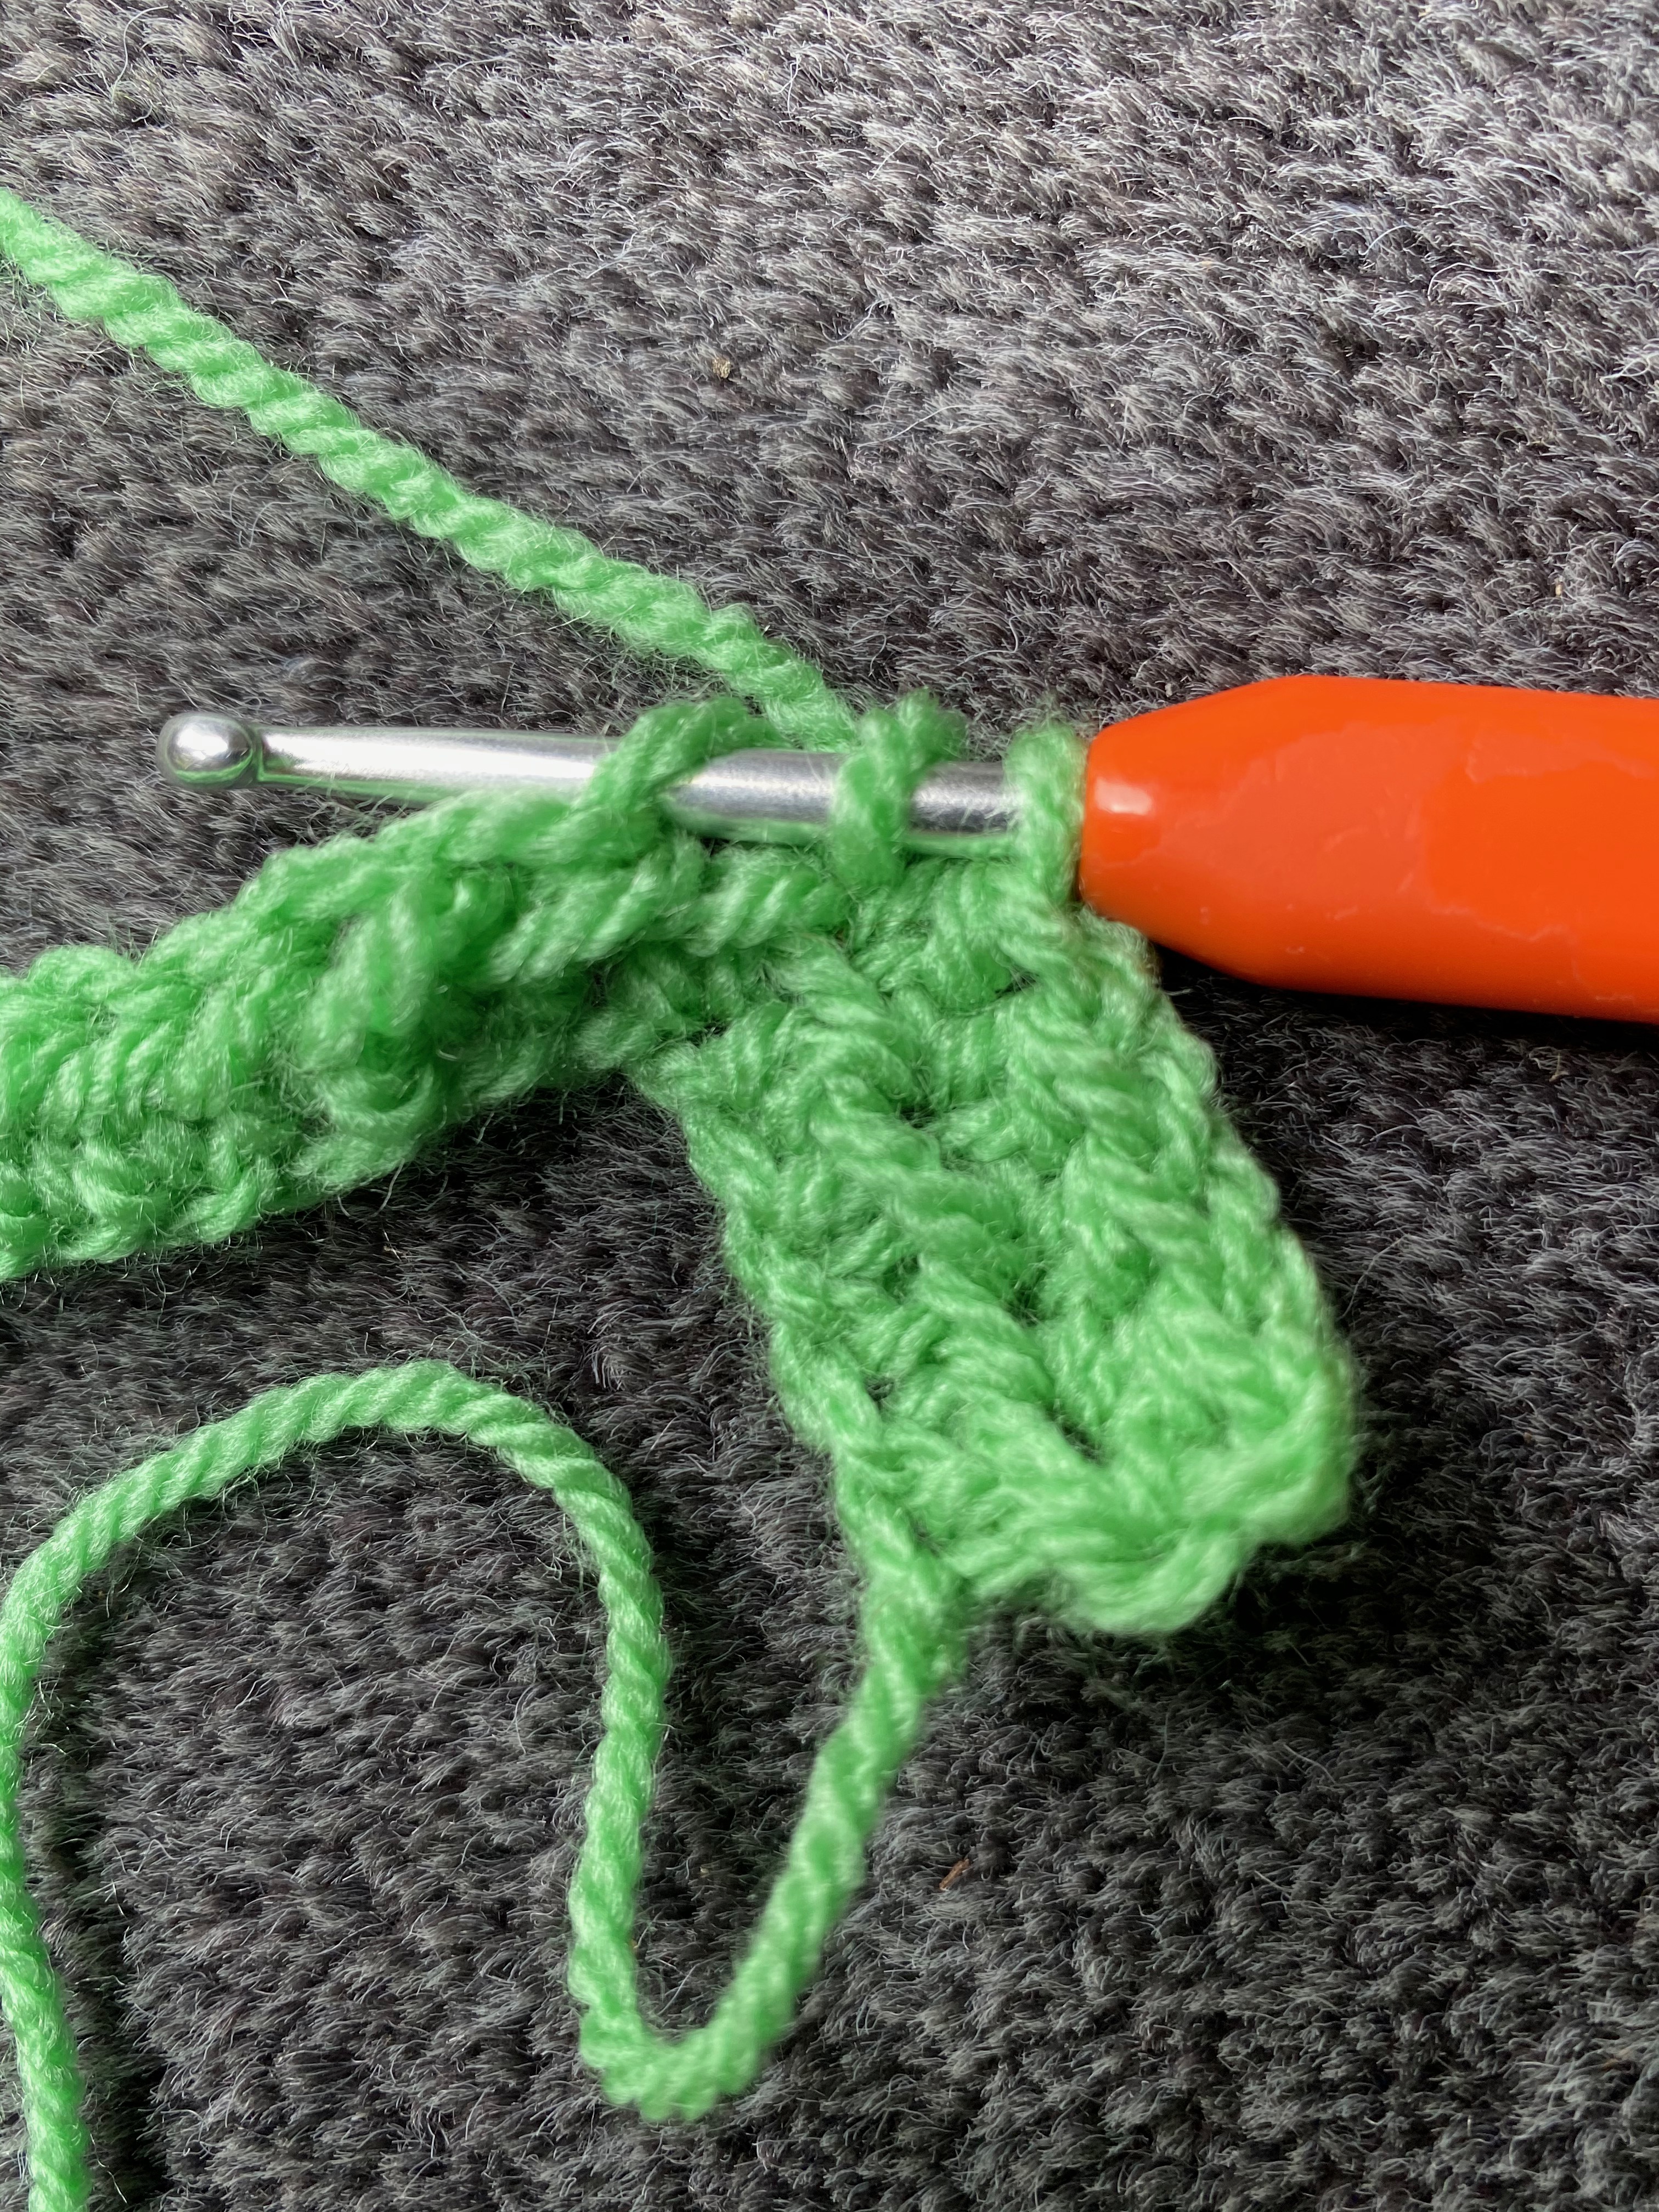
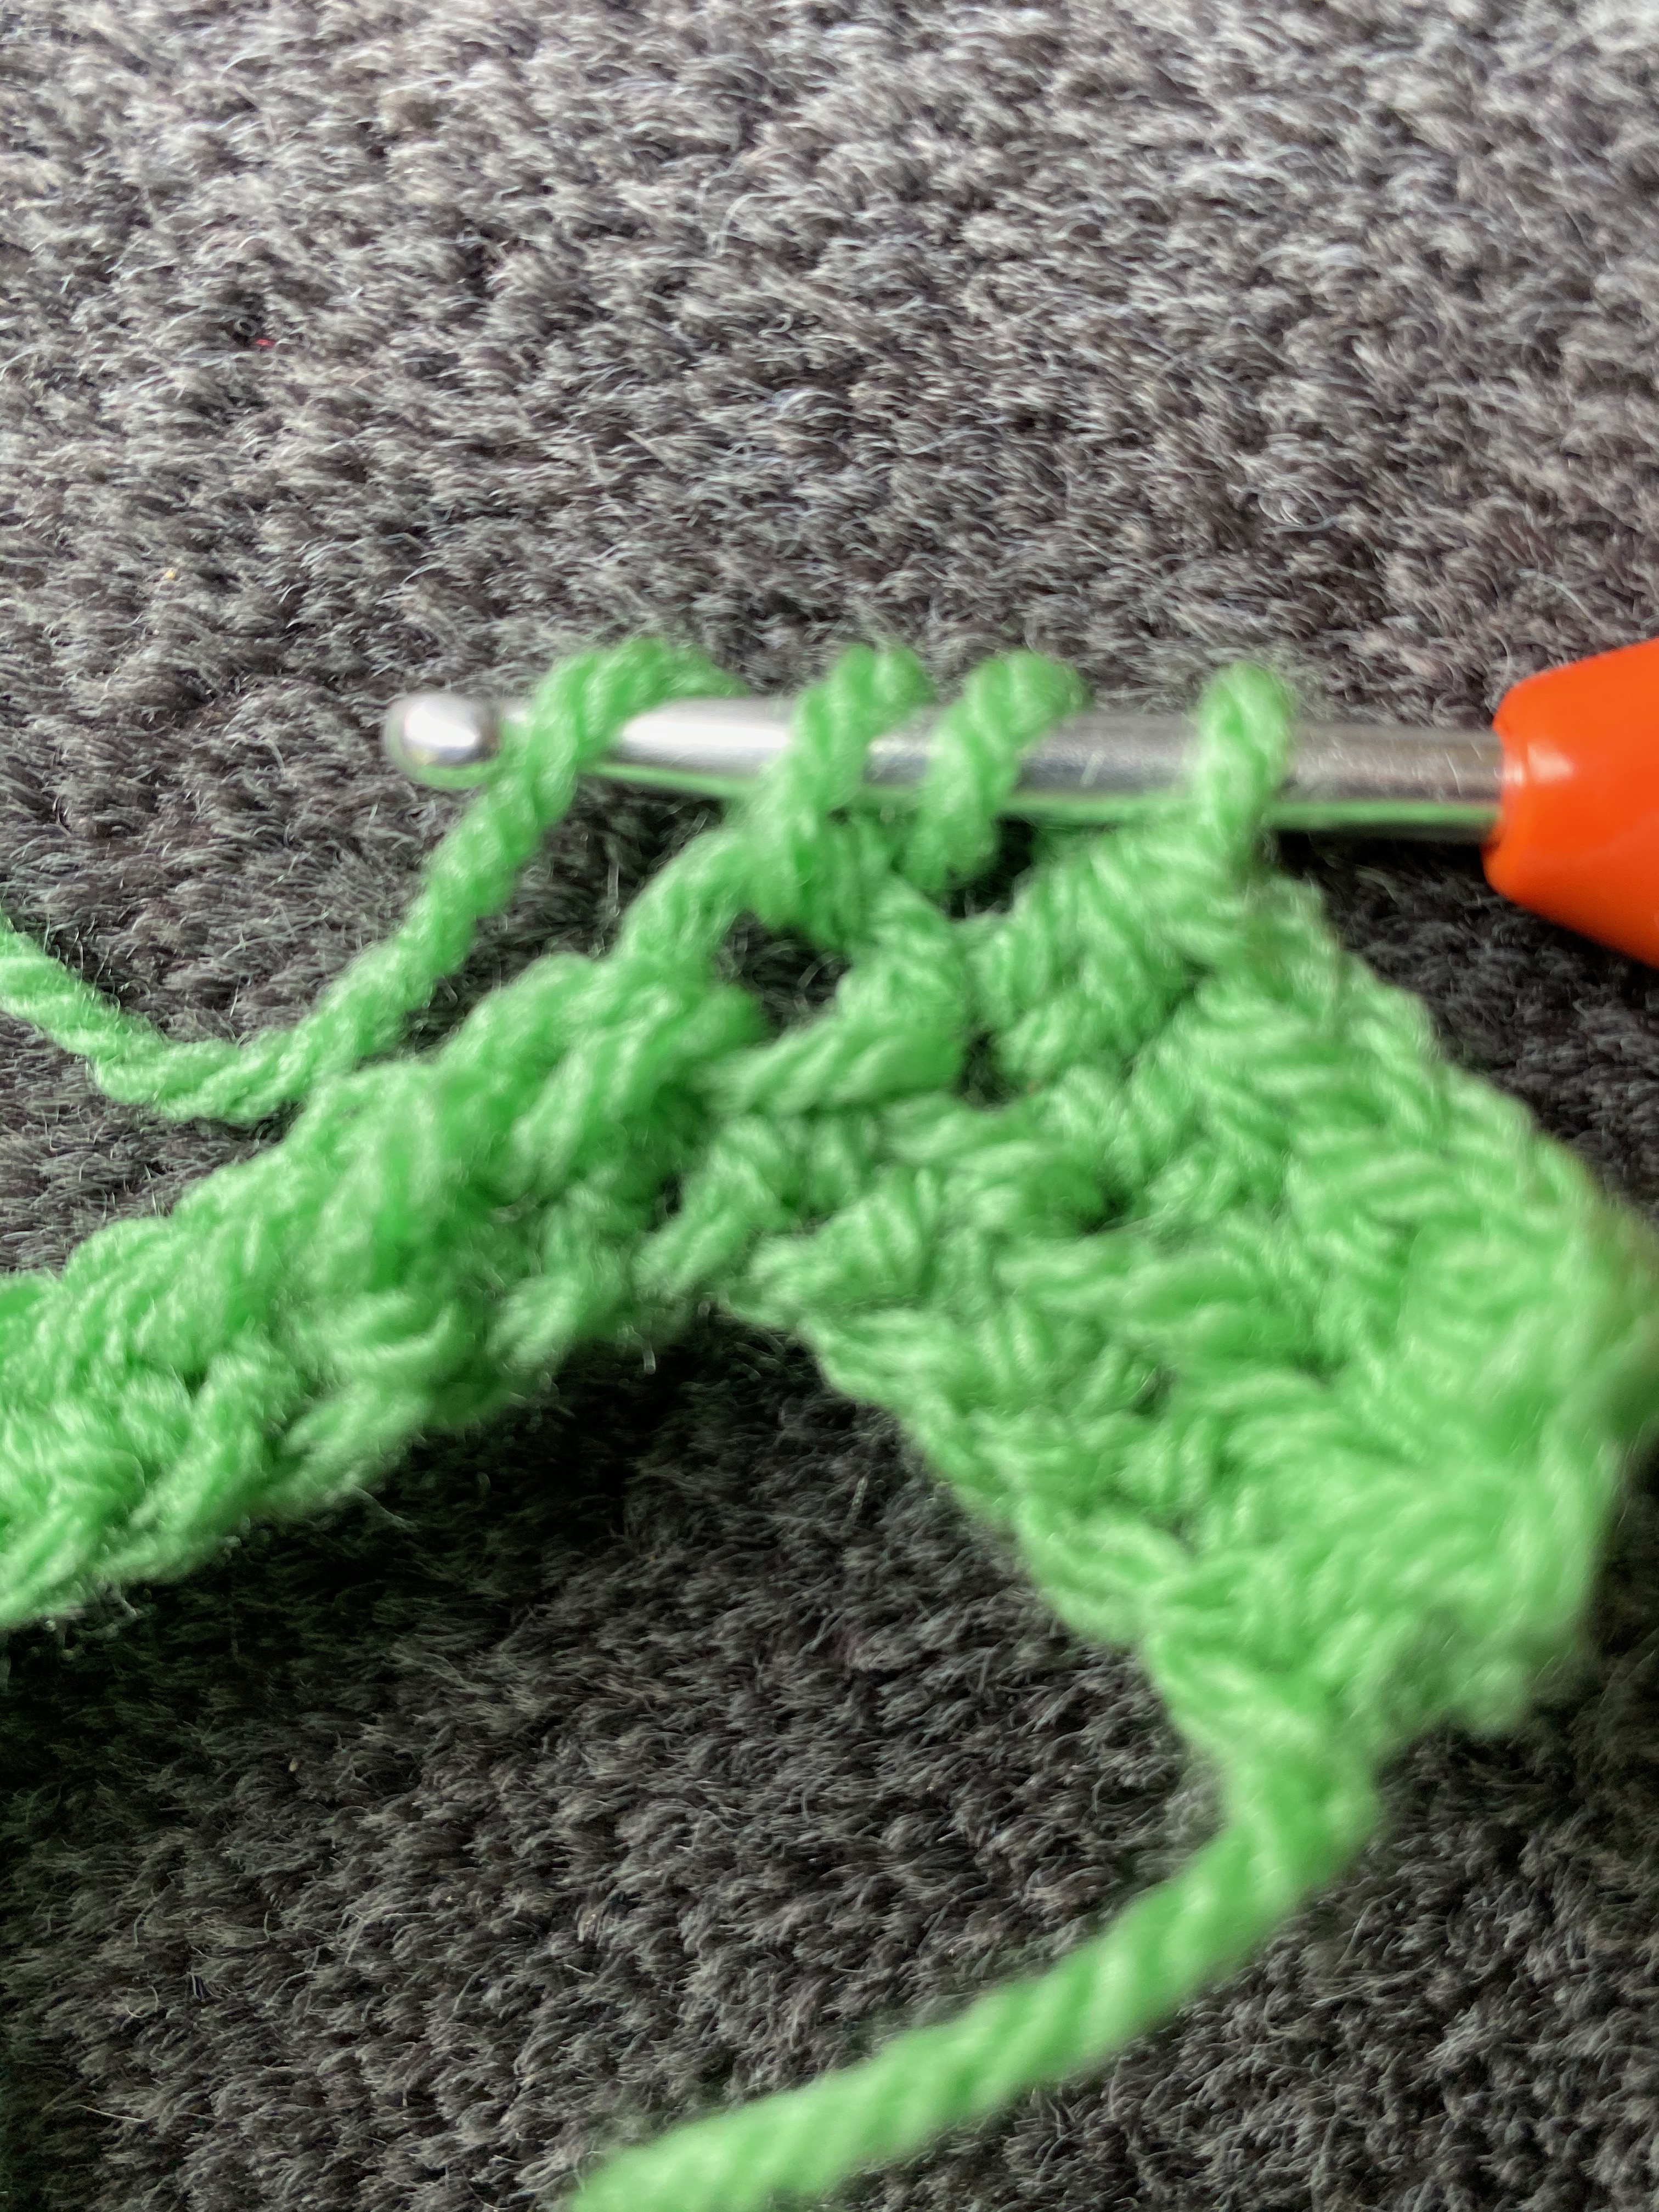
Row 1
- In the third chain from the hook I place a HDC. I then work 1 HDC into each chain across the row. I chain 2 and turn the work.
Row 2
- I insert the hook into the first stitch and work one HDC into each stitch across the row, chain 2 and turn.
Now keep repeating row 2 until you reach your desired length (see my example below if you are unsure).
Step 2
I am making good progress. There is something relaxing and calming in repetitive stitch making. Helps me to deal with a variety of stresses and gives me great “me” time. I love the fact that making twiddle creations to benefit patients in hospital, benefits me as well.
As you crochet along, you might like to change yarn colour, stitch or even yarn texture. Think about what could interest and engage the patient. But most importantly, make sure you are enjoying yourself!
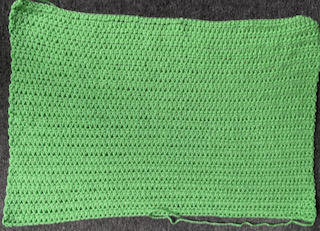
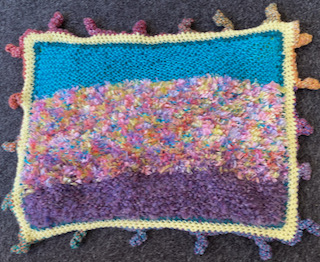
I decided to keep this one ‘plain’, no added stitches or colours. I have crocheted 42 rows and the mat measures 33cm (13 inches) and decided to stop. I am ready to attach some twiddle items.
Step 3
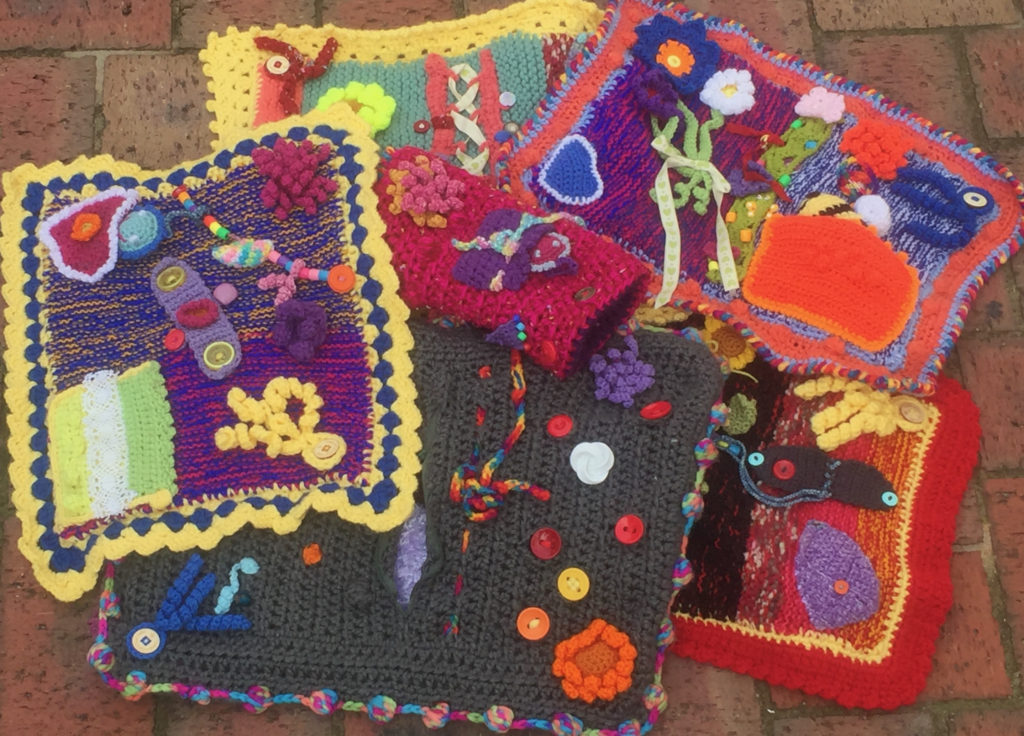
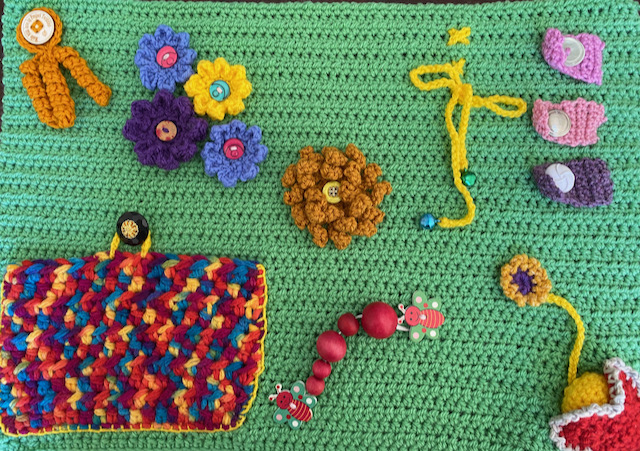
Usually I plan to include at least 5 different twiddle items to promote interest and engage the patient in playing with the twiddles. In this example I am not working towards a theme but randomly making and attaching the twiddle items.
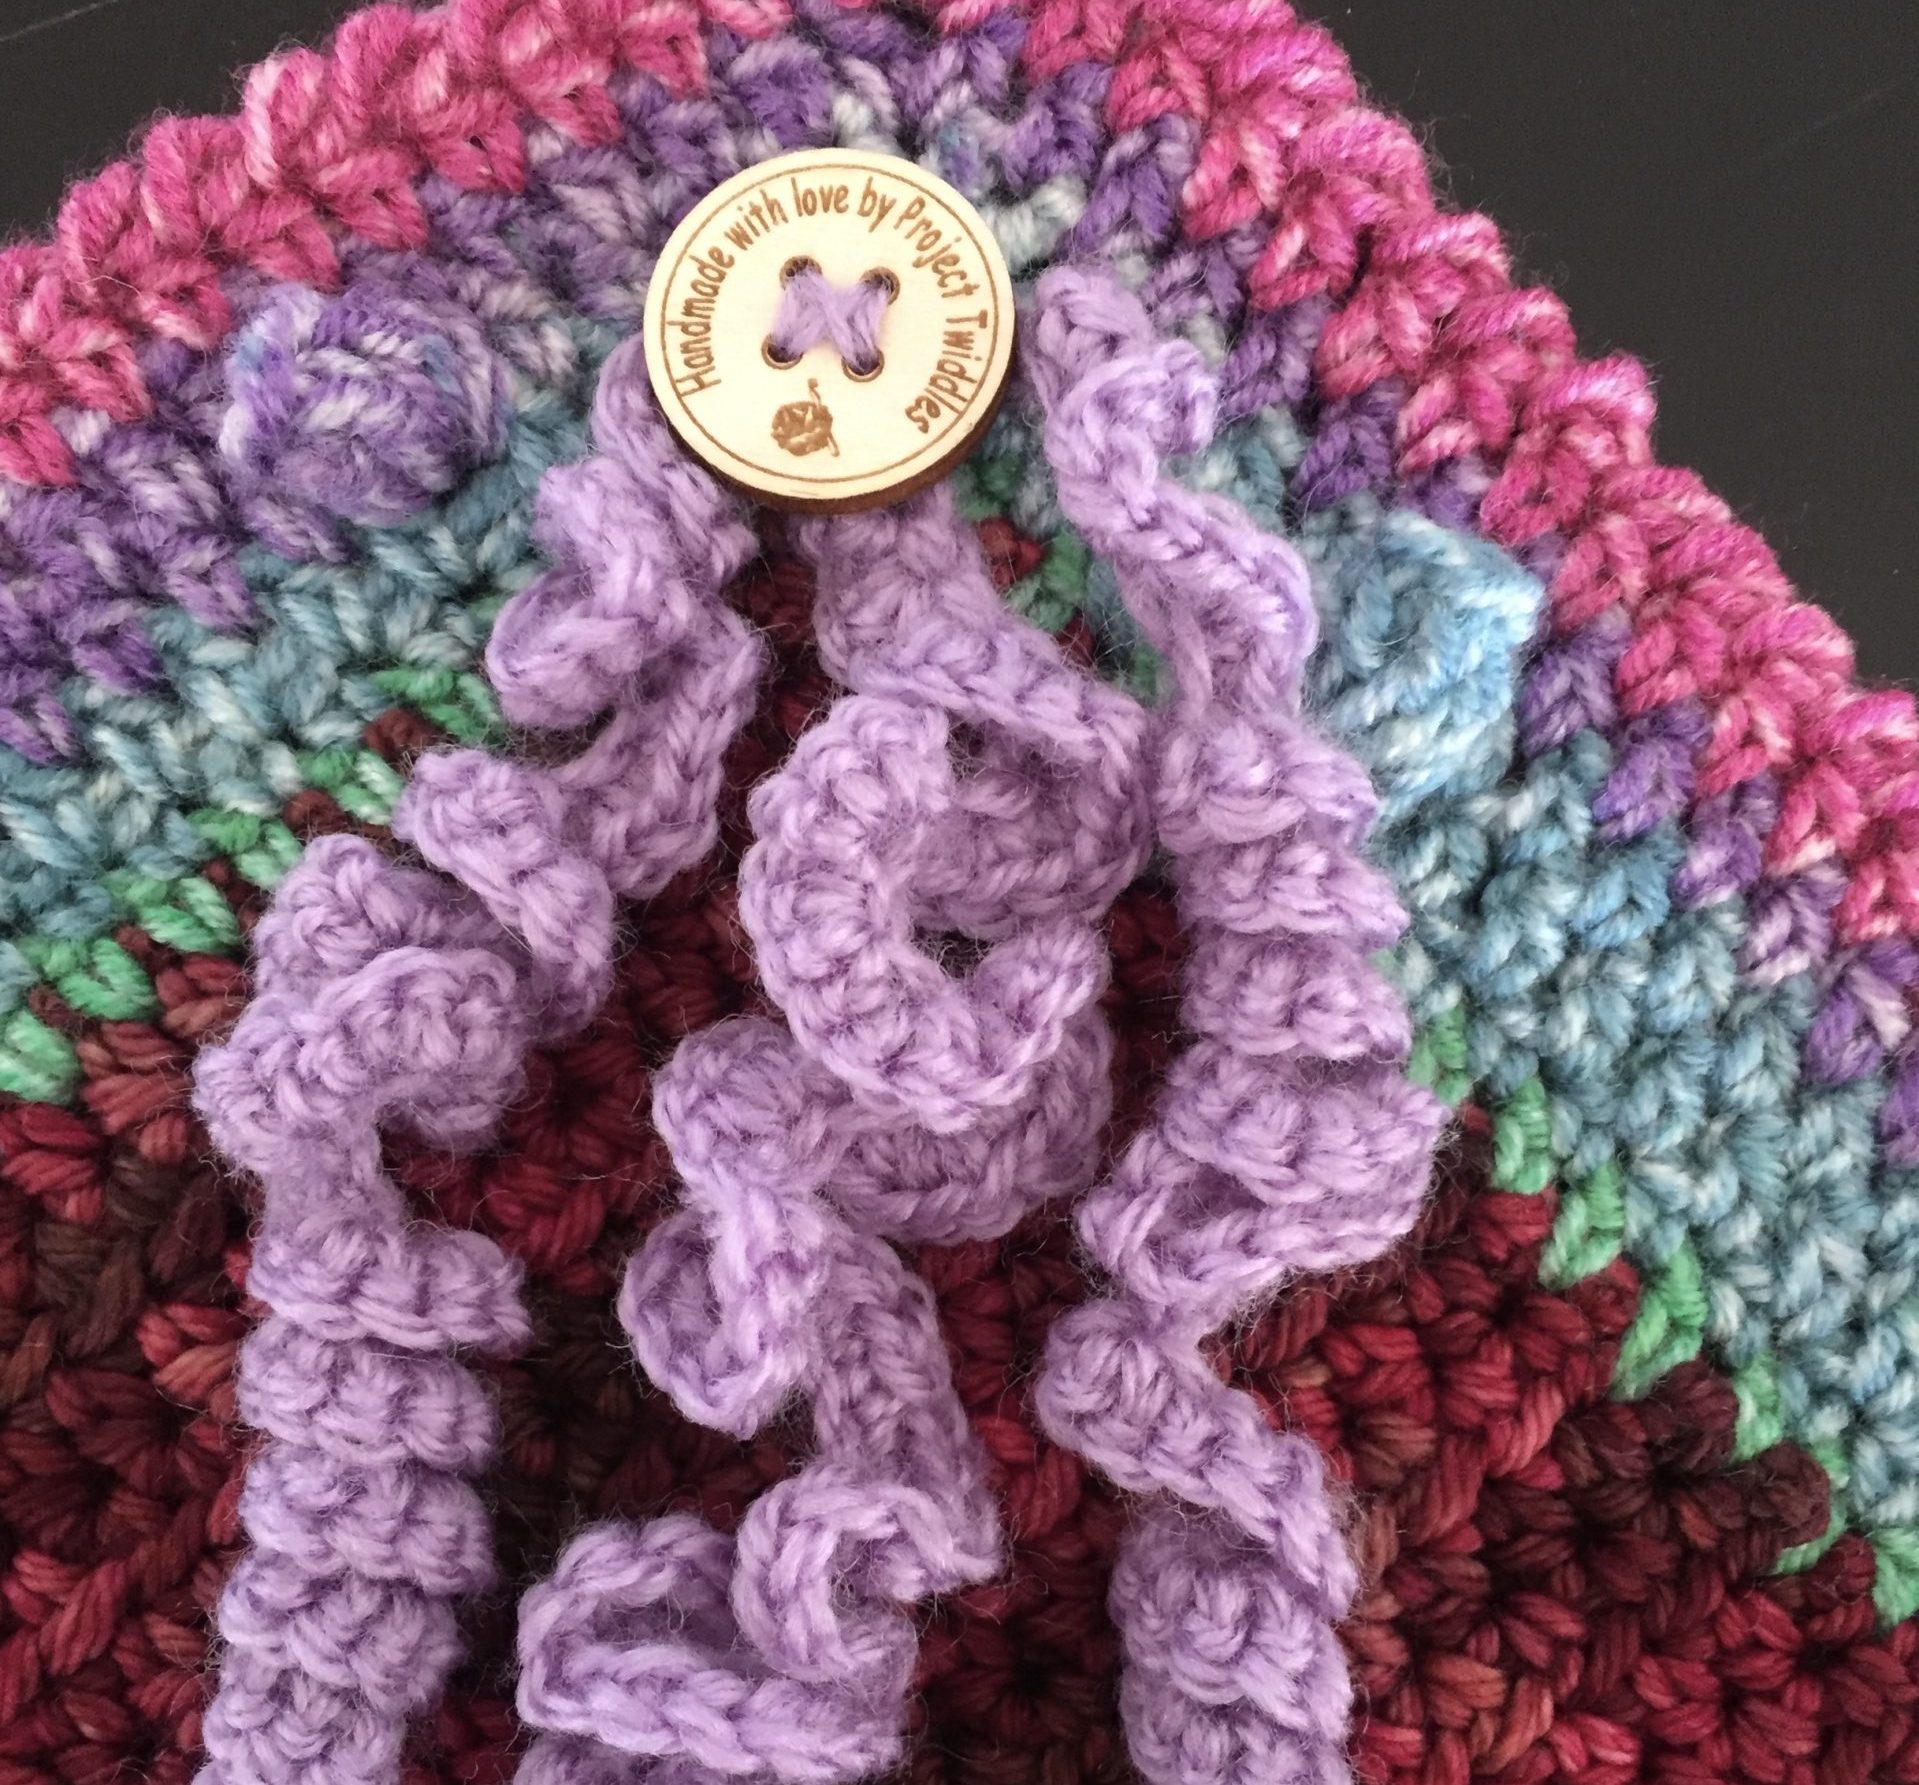
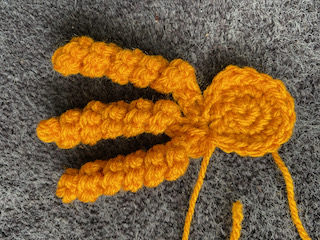
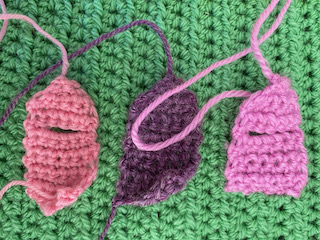
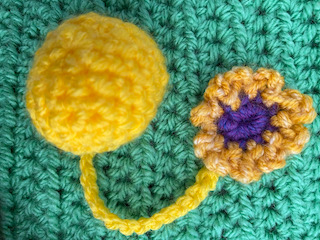
The first twiddle item is the Project Twiddles twirls. What a mouthful! The twirls go on all my creations and the pattern I use is found at Project Twiddles Twirls. You are welcome to change the design to suit your mat and of course you don’t have to include it as one of your attachments. I do recommend having fun with the twirls though as they are easy to make and can add a lot of interest to your twiddle creation.
Following the Project Twiddles twirls pattern at Project Twiddles Twirls I make my twirl, ready to attach it to the mat.
The next twiddle item is the Project Twiddles Twirls flower found at Project Twiddles Twirls Flower. These flowers are such fun to make too. You could use multiple colours for added interest. I created this flower to provide the patient with something to run their fingers through, a sensory experience
Button flaps provide the patient with the button and button hole to play with. The pattern instructions are found at Button Flaps
An easy twiddle item is to make a chain and thread it through gaps in the crochet mat. I always secure the two ends with a needle and thread so the patient can’t pull out the chain. This gives the patient an opportunity to make and remake a bow.
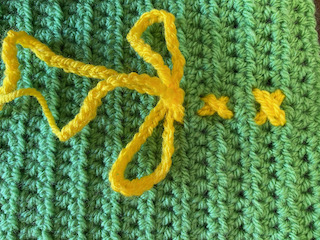
Instead of a chain you can use ribbons and laces. They work really well to keep patient occupied making bows. I decided to attach little bells to the ends checking that the sound is not too loud. The sound can annoy other patients and health workers.
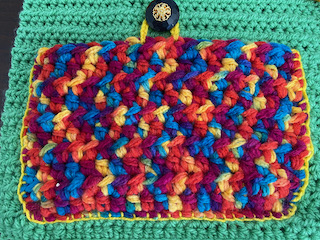
And there is always the pocket which can be made in many different ways. Have look at Everyone loves a pocket! This time I opted to make a rectangle shape in HDC in brightly coloured yarn. I have attached the pocket using blanket stitch and placed a button and button loop at the top for added interest.
I like making hearts in many different sizes to put on my twiddle creations but my favourite pattern which I have used for this mat is a very sweet pattern found at Annie Design Crochet website, https://www.anniedesigncrochet.com/2019/01/25/vintage-crochet-hearts-free-crochet-pattern/
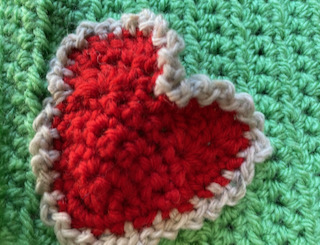
If you look though my twiddle creations you will see that I sometimes put little ‘surprises’ inside pockets and hearts, like very small smiley faces or small animals, just to add to the sensory experience. This time I am putting a squishy ball into the heart pocket. So that it doesn’t get lost or placed in the patient’s mouth I have attached it to a the very small buttonhole flower.
Looking at the mat so far I think I need a different type of twiddle item.
Flowers are a standard twiddle item for my twiddle creations. For this mat I decided to include 3 eight petal flowers. I will attach them to the mat using buttons once again. Buttons are a great object to collect. Ask around family and friends to help out. You will be surprised at how many donations you will get.
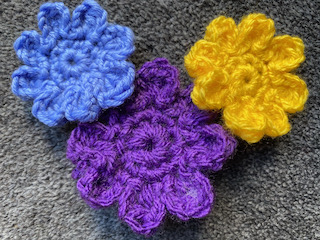
The pattern for these simple flowers is at: Eight Petal Flowers Once you are confidently making these flowers, adapt the design to suit what you want to place on your mat. Have fun with the design.
And lastly I attached some beads. The beads are threaded on a very narrow ribbon which is sewn on with strong thread to the mat. At each end I have attached a button for extra security. I do not want the beads to come unattached and be a danger for the patient.
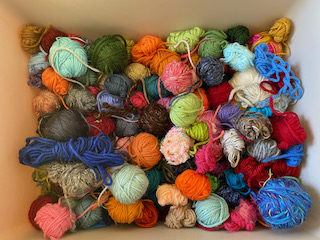
I have quite a collection of interesting bits and pieces at home that I rummage through to find pieces I can use and for inspiration. I visit $2 Shops, Op shops to find things to add to my collection. Lots of fun and I really do like the idea of repurposing things, especially form OP shops.
The twiddle mat is ready for the next step!
Step 4
Now to the backing. I back every mat /blanket. This gives the mat weight so that it stays on the patient’s lap. More importantly it covers all the threads and places where the twiddle items have been attached.
Ideas I have used to make a backing include:
- You could crochet or knit another piece the same size as the one you are working on, perhaps using yarn scraps, different colours, textures and type of yarn.
- I have used material like fleece and sewn it on to the mat using my sewing machine.
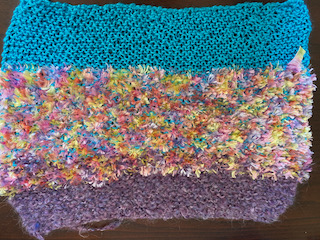
- I have turned leftover and discarded knitting and crocheting pieces into backing pieces. And this is what I am going to do this time.
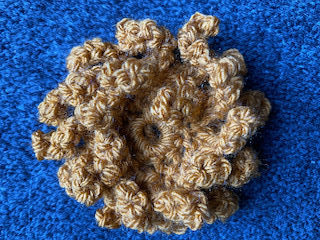
Wonderful participants at the Royal Melbourne Hospital have given me lots of pieces to turn into twiddle creations. I have selected this one to be the backing for this twiddle mat. Lots of interesting texture for fingers to engage with.
Step 4
Nearly finished! We are now at the stage of stitching the backing to the twiddle piece and deciding whether to make a border (sometimes called edging) and if yes, what will the design be.
I attached the backing to the twiddle mat using safety pins. I have found that the bulky material sometimes hides pins. Even though I carry out multiple safety checks, I am concerned that one day a patient will find a pin that has hidden in the yarn and hurt themselves. So its safety pins that give me peace of mind.
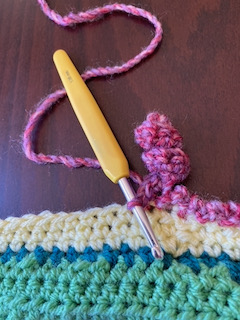
I crocheted the 2 pieces together using a dark green yarn and SC which is my go to stitch around borders. I decided to add two more rows of SC in a light yellow colour. I felt that the mat needed a finishing row that added more interest to the mat.
The final round is the same stitch I used on the heart pattern. The yarn is a very soft bulky yarn from my stash.
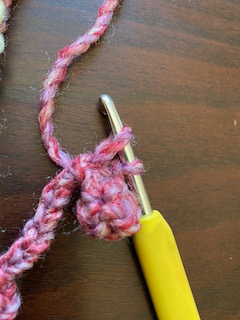
- Join yarn anywhere. Make 2 chains, slip stitch into next SC, chain 2, repeat 9 times.
- On the 10th stitch I made a twirl.
- Chain 10, now come back along the chain. Start in the 2nd chain from the hook and place 2 SC. Do this right to the mat edge and slip stitch into next SC. Carry on around the mat. Ties off yarn and weave in the ends.

And we are finished! I do hope you enjoyed making the twiddle mat with me, and you’re inspired to make lots more for the patients at the Royal Melbourne Hospital.

Happy creating everyone!